With bouquets, it’s all about practice makes perfect.
Today I opened up my grand market selection and decided to make a single hand-tied bouquet out of the contents.

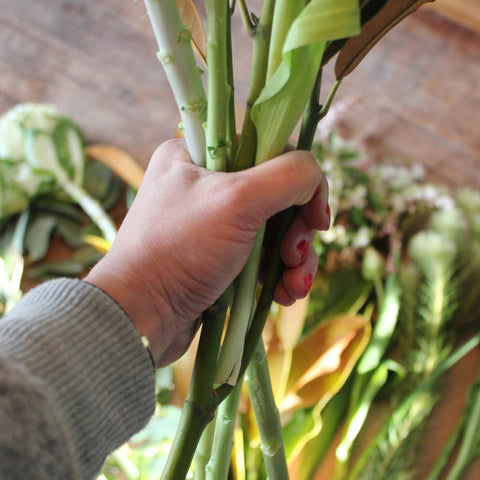
To start, I chose a good firm piece of foliage as the centre/start point. Hold the bunch at the binding point with your left hand if you are right-handed and vice-versa if you are left-handed.

From there I use focal flowers to structure the bouquet. A focal flower is a flower that stands out from the rest, normally larger, and all bouquets should have a minimum of one. Today I am using brassica as my focal flower.
Add the stems into the hand you hold them in with the other hand. Insert the stem at an angle so the end of the stem points toward your body and the flower head is angled away from you. Keep inserting them in the same direction creating a spiral effect as you keep adding stems of each variety. Keep the focal flowers spaced out so the whole bouquet is interesting to look at and has good balance.

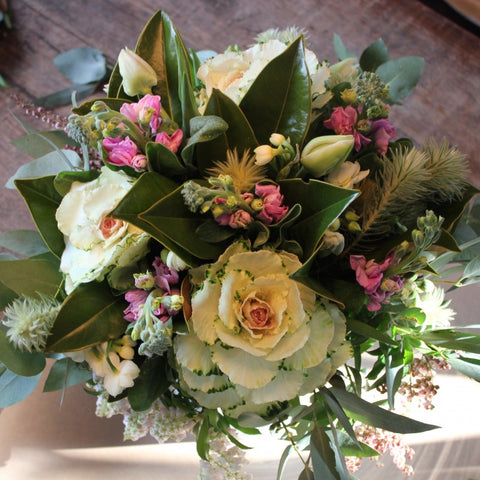
Once you have added all the flowers you can use foliage to finish off and balance the outer-most layer of the bouquet then tie it off with twine. In this instance, I have used eucalyptus and flowering peris japonica which are droopy and create the cascading effect around the edges.
Cut the bottoms of the foliage so they are all a similar length and will fit into your vase nicely. Cutting each stem on an angle increases the surface area of the opening for water to be absorbed so can help with your flowers longevity.
Voila! You have your bouquet and can now choose a suitable vase to display it in.